
A GIF, pronounced jif with a soft g, is a moving picture. It’s not a video, just a series of moving pictures, even if the source is a short video. That’s why a GIF can look fairly jerky. This jerkiness seems to add an entertainment factor, since a GIF is usually supposed to be funny. GIFS almost always record silly things that people or animals have done. There is no sound involved so the file size is usually quite small, depending on the size of the images.
There are several ways you can make your own GIF but we’ve found an easy and simple way to do it with the help of a website. Ezgif.com will take your short video or series of photos and create a GIF that you can then download to your computer. Here’s an example of a GIF that we made from a video that we recorded last weekend:
We’re not sure what’s happening here but it’s quite hilarious. Here’s how we did it, step by step. You don’t have to go through all of the hoops that we did but the principles are the same.
1. Your video can be from your mobile device, your PVR (as it was for us), your digital camera, anything that creates a small movie. You can also make a GIF out of a series of photos. In order to do that, your photos have to be taken over a short period of time and show the same object(s) in motion. The objects could move or you could take several photos as you move around the item.
2. Find the video or series of photos on your computer. It’s easier to copy and paste them onto your desktop. This makes uploading them to the site much easier.
3. Head over to Ezgif.com . At the top of the page you’ll see the following:
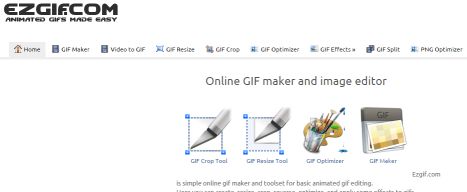
4. If you have a series of photos, click on GIF Maker. For a short video, click on Video to GIF.
5. The tools are all on site. We can’t explain everything that’s there but the principle is basically the same as the tools in Instagram, for instance. Upload your material, change it and arrange it so it looks good to you, then download the finished GIF to your computer.
6. Once it’s on your computer you can share it on various social media sites or email it to friends. About the only thing you can’t do is post it on Facebook. Renren, the Chinese equivalent (more or less) to Facebook is loaded with GIFs. We’re not sure exactly why Facebook doesn’t allow GIFs but they don’t.
7. Our process was substantially more complicated . We’ll run through what we did, just in case you find yourself in the same situation.
We like NASCAR and record every race we can, just in case there’s an interesting bit of action that we’d like to preserve or archive. We saw the stumbling man and thought it would make a perfect GIF.
Our PVR records in an unusual HD file format. We wanted to cut the funny bit out of a much longer video file, something we usually do in Windows Movie Maker, but the original file wouldn’t work in WMM. Using Handbrake, we changed the .ts file into an MP4, a file that would work with WMM. That process took a while since the .ts file was six gigabytes in size. Once we had the MP4 file, we opened it with WMM and cut out the short section we needed and saved it.
Next we uploaded the small MP4 file to Ezgif.com and took some time sorting out all of the various settings. You can change the size, the number of frames as well as adding a filter, very much like Instagram. Once we had our GIF the way we wanted it, we downloaded it to our computer.
We’ve given you the basics of GIF creation. If you have problems, feel free to ask us for help. Comments and questions are welcome but Likes on our Facebook page get immediate attention. Here’s the link: Computers Made Simple on Facebook .
Thanks for reading!