
There’s a new twist in the Windows 8/Google Chrome situation. For whatever reason, Windows 8 won’t allow Chrome to update itself to a new version. One of the main reasons to use Chrome is that it updates itself, if necessary, every time you open it. That’s changed for Windows 8 users and, perhaps, for users of older versions of the Microsoft O/S. Here’s one version of the error you get when you try to update Chrome when it says your version is outdated:

Here’s how to get Chrome to update itself.
Note: This technique requires you to have admin privileges on the computer you are updating. If you don’t, get the person who does have them to do this. It might be better to print this page so you don’t have to go back and forth between windows.
1. This update requires you to install a template. Don’t worry, you can’t break your computer doing this so relax. A template is a small file that you ask Windows to install for you. After that, you change some of the parameters in the template. No big deal, no chance of ruining something. If you miss a step, Chrome can’t update until you go back and fix things. Everything else will work fine if you follow the steps as we describe them. Get the template here: Google Chrome Group Policies Template That should be a direct download. If it doesn’t work, go here and download it. The file should go to your Downloads folder. If it doesn’t, you’ve changed the settings so make a note of where the file is saved.
2. Next, we’re going to find and use the Run dialogue, the one that used to be just above the Start button. Press the Windows key on your keyboard and r (at the same time). A small window will open, like this:
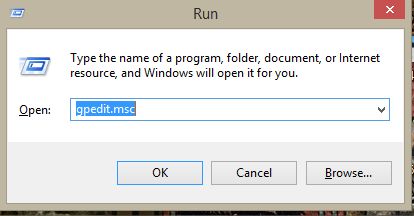
3. When it does, type gpedit.msc in the box, exactly as you see in the photo. Another menu will open after a brief pause while Windows thinks about it. This is what you’ll see next:
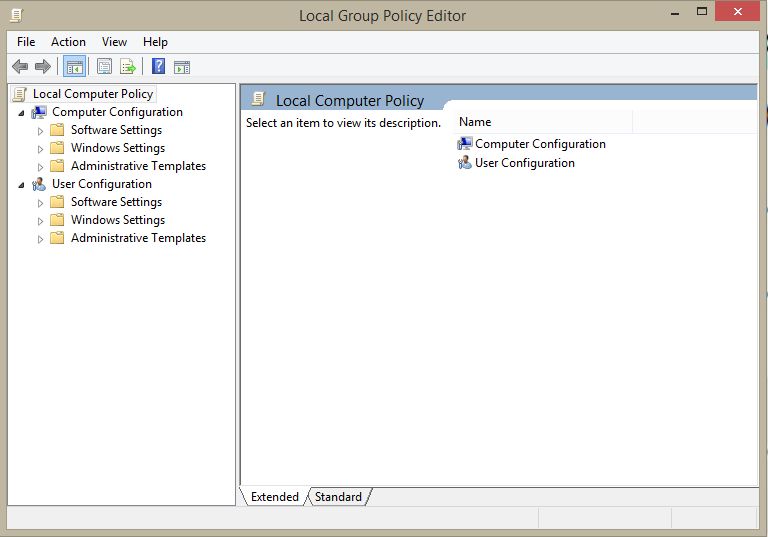
4. You’re going to be working in the right pane later on but right now, look for Administrative Templates in the left pane. Right click it and choose Add/Remove Templates. This tells Windows that you want to add the file (template) that you just downloaded.
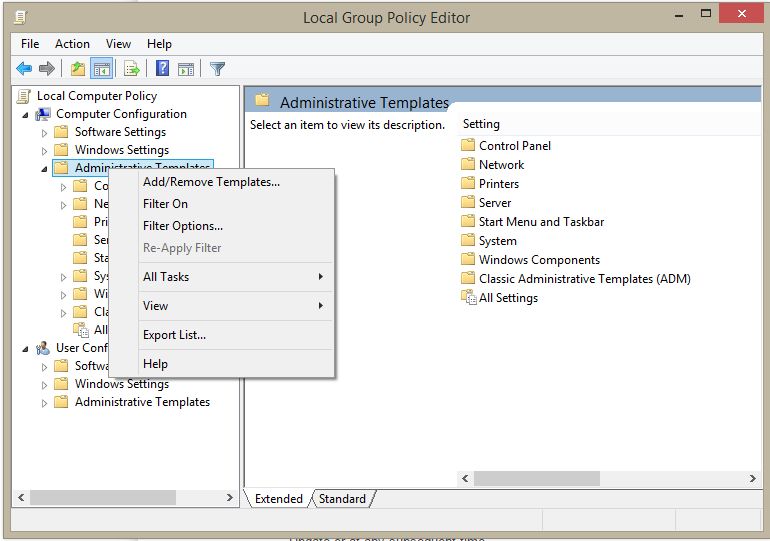
Another menu pops up, like this:
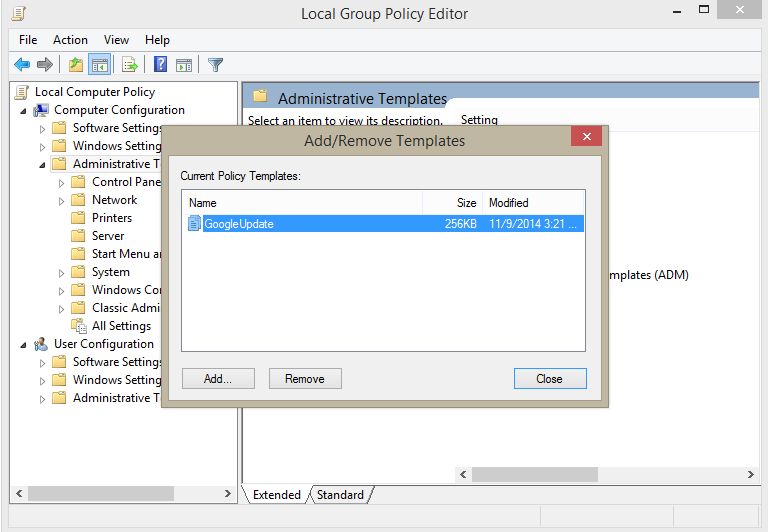
5. Note that your menu should be empty while ours has the Google Update already installed. Don’t worry if the box is empty, click on Add.
6. Navigate to your Downloads folder. The only file that should show up, other than any folders you have there, is the ‘adm’ file from Google. Click it then click Open down on the bottom right.
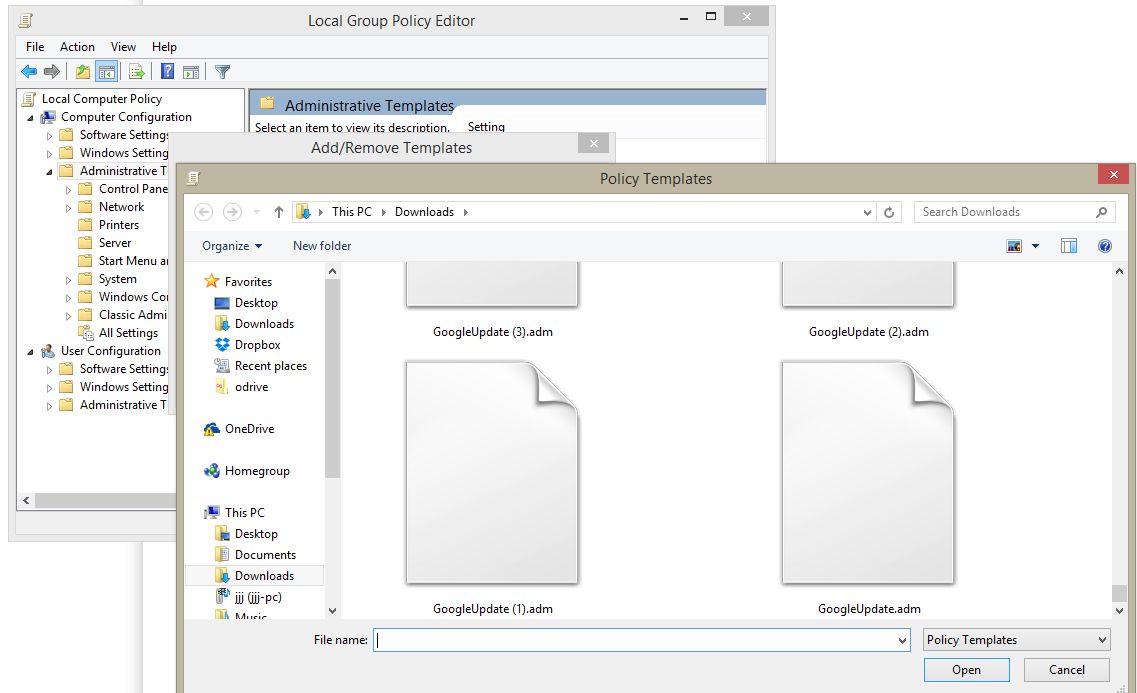
7. In the previously blank menu, you should see Google Update, a file size and today’s date. Click Close to add the template to Window’s list of templates. Note: This window is a bit confusing. Normally, the ADD button would ‘add’ the template but here it’s only used to find the template on your computer. Once you see the template in the menu box, close the box and the adm file is added to the list of templates.
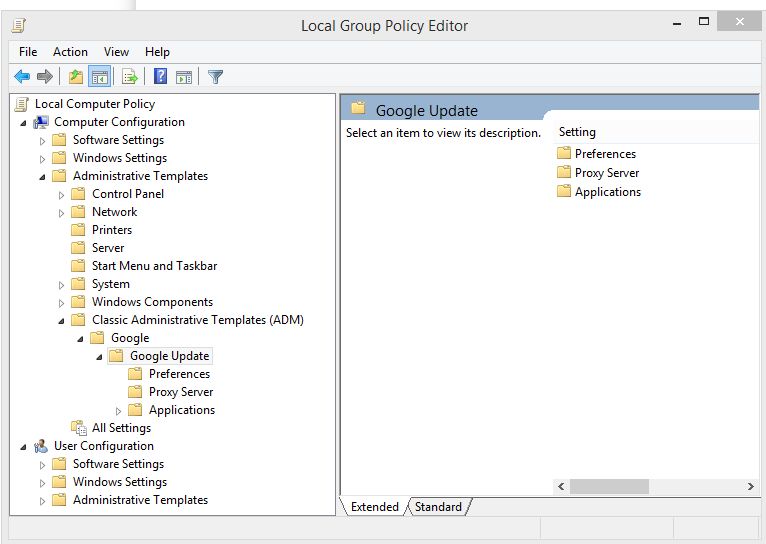
8. Back to the left side again. You should probably click on the box to the left of the X icon. That will open the menu to full screen. (Print this post so you can keep track of what you’re doing.) On the left side, click on the following arrow icons, just to the left of the words you will see next: Administrative Templates then Classic Administrative Templates (ADM) then Google then Google Update. If you’ve followed us so far, this is what you’ll see on your screen:
9. Here’s a tip to help you navigate through these menus. In the left pane, you just have to click on one of the folders to open it. In the right pane, you have to double click a folder to open it. The folder we want to open first is the one that reads Preferences. Once it’s open, this is what you’ll see:
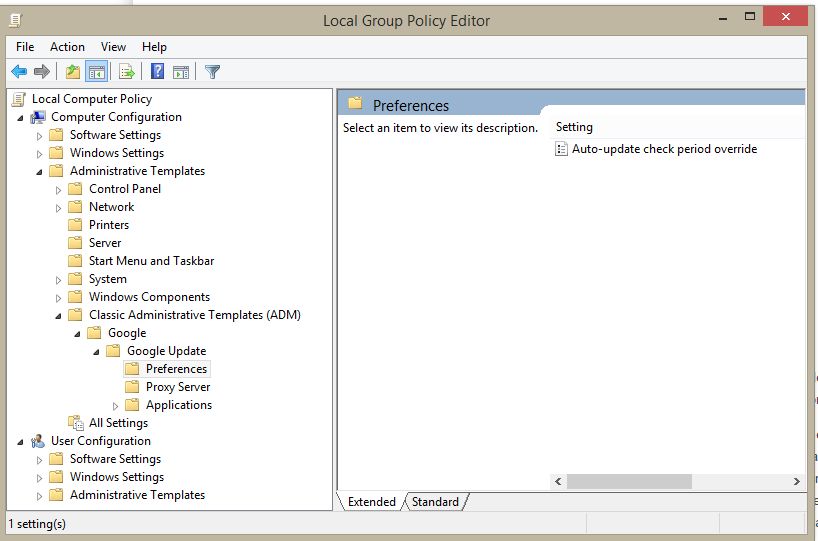
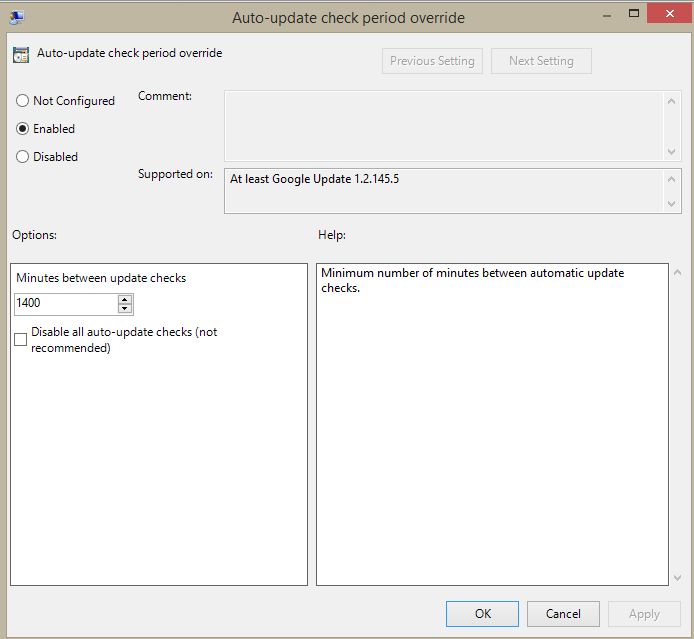
10. Over to the right side now. Under the Setting tab, you’ll see Auto-update check period override. You can open this two ways, first by double clicking it or simply by clicking one and choosing the link ‘policy setting’ that pops up. Make sure your box looks exactly like ours, click Enabled to choose it and set the minutes to 1400, if that is not set already. Click OK to save this step.
11. We’re finished with Google Update so let’s look a bit farther down the list on the left and find Applications. Click the word Applications once and a full list of folders opens up in the right pane. Guess what? The one we want is waaayyy down at the bottom of the list. Scroll down until you see Update policy override default. Our setting is Enabled but yours won’t be until you change the settings. You can either double click that line or highlight it by clicking once then clicking on the words ‘policy setting’ up at the top in the same pane. This is what comes up next:
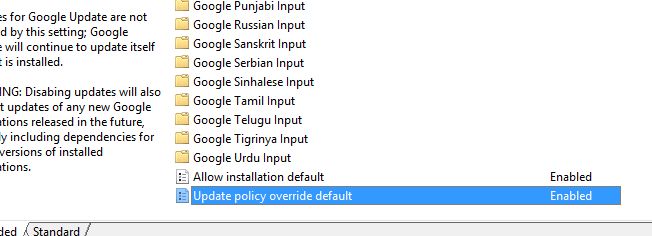
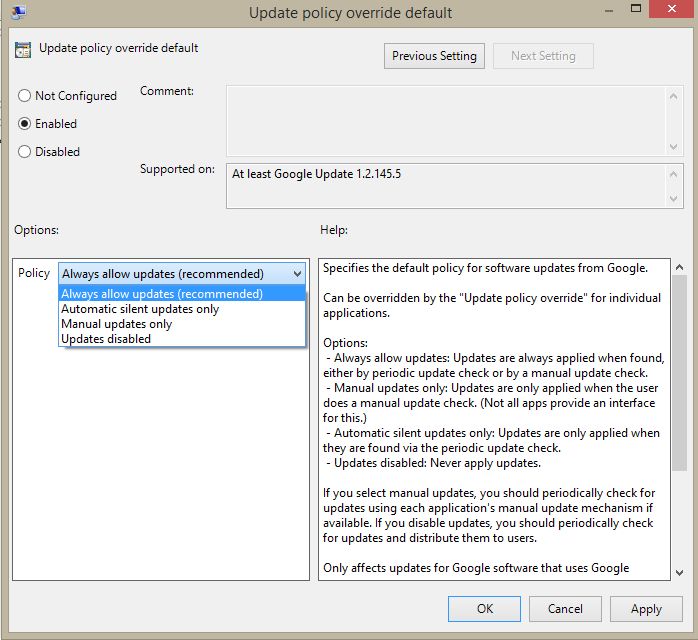
12. Make sure you choose Enabled then click on the arrow in the Policy pane and choose Always allow updates (recommended). Click Apply then OK to save your changes. Next, go back to the bottom of the right window and open the ‘Allow installation default setting’. It’s right above ‘Update policy override default’ that we just changed.
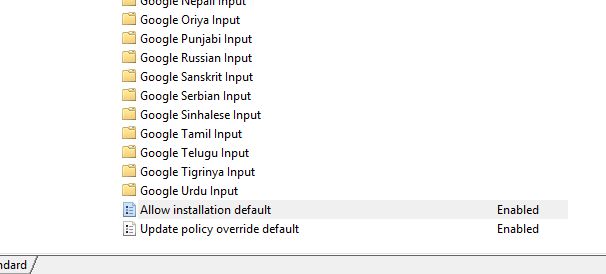
13. In this window, choose Enabled then press Next Setting. In that window, choose Enabled also. Then click Apply and OK.
14. You’re almost done, don’t worry. At this point you’re a pro so we won’t hold your hand for the next four steps. Move back to the left pane and look for two folders: Google Chrome is one. Google Binaries is the other. They aren’t too far from the top. Once you’ve found the first, Chrome, change the two settings on the right EXACTLY the same as you did for step 11 and 12. Click Apply and OK for Chrome then move to Chrome Binaries and do the same thing for it. Two boxes, change them to Enabled and Always allow updates. That’s it!
15. In total, you have added one template and changed seven settings. Close the Local Group Policy Editor down, close Chrome then reopen it. On the top right of the page, click on the three horizontal lines and choose About Google Chrome. If you’ve done everything correctly, Chrome will run through the update routine and install the latest and greatest version of itself. Pat yourself on the back and smile. You did great!
Yes this is a long post but it’s not something we could do in two parts. If you have problems, let us know. We’ll see what we can do to help.
Comments and questions are welcome but Likes on our Facebook page get immediate attention. Here’s the link: Computers Made Simple on Facebook
Thanks for reading!