
Google Chrome’s autofill is a useful tool, very handy when you’re completing forms online. Everything works well until you move. According to your computer, you’re still at your old address. Whoops! Here’s how to change that. It’s not as intuitive as you might think.
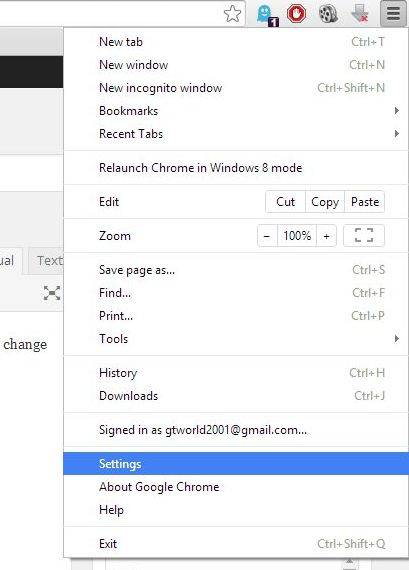
1. In any window in Chrome, look for the three horizontal lines in the top right corner. Click on that icon and this menu will open.
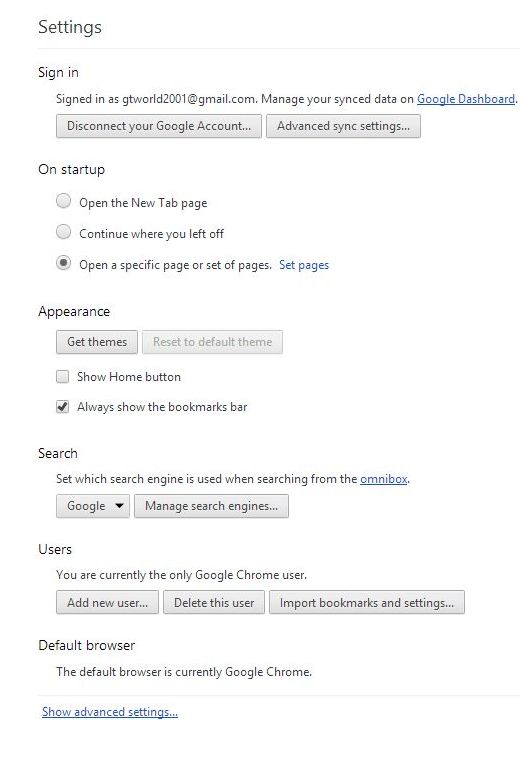
2. Choose Settings. In the next window, choose Show Advanced Settings.
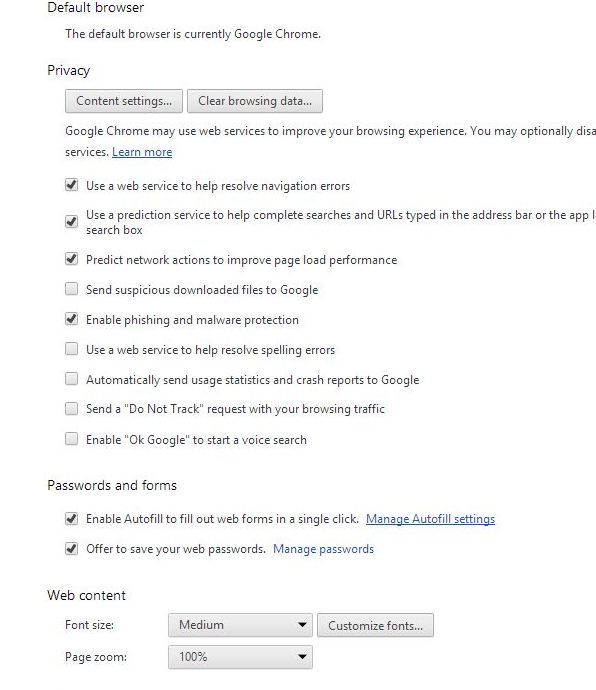
3. This will open up another section at the bottom of the current window. Scroll down until you find Passwords and forms. On that line you’ll see Manage Autofill settings.
4. Click on that and this window will pop open:

5. Fill in your new address and you’re Done. Click it and Chrome will now show your current address.
TIP: You will see a spot for Credit cards but we do not suggest entering that information in Chrome. If you want a website to remember your c/c info, that’s up to you but we don’t think you should let Chrome save that.
Thanks for reading! Comments and questions are welcome. Use the form below or Like our Facebook page.
Here’s the link: