
In our last post we taught you how to use the mosaic filter in GIMP to hide part of a digital photo. Today, we’ll have some fun with the clone tool. First, some basics.
Cloning is simply copying parts (pixels) of a photo and putting them somewhere else in the photo or, in some cases, into another photo. If you’ve seen the covers of certain trash magazines, the ones that show one famous person on a date with another famous person, then you’ve seen how cloning works. Fake celeb photos are (mostly) examples of cloning.
In your digital camera, the ‘remove red eye’ feature is another example of cloning. The camera takes pixels from surrounding areas of the photo and replaces the ‘red eye’ with those pixels. You can do the same thing on your own with photos that still contain red eye or, let’s say, photos with someone that you don’t want to see in the photo anymore. You can use the cloning tool to edit out a face, a cloud or a whole person. Have fun with it!
Here we go:
1. Open the photo that you want to work on in GIMP. The tool we want to use is available through the icon of a rubber stamp. Here’s what we want:
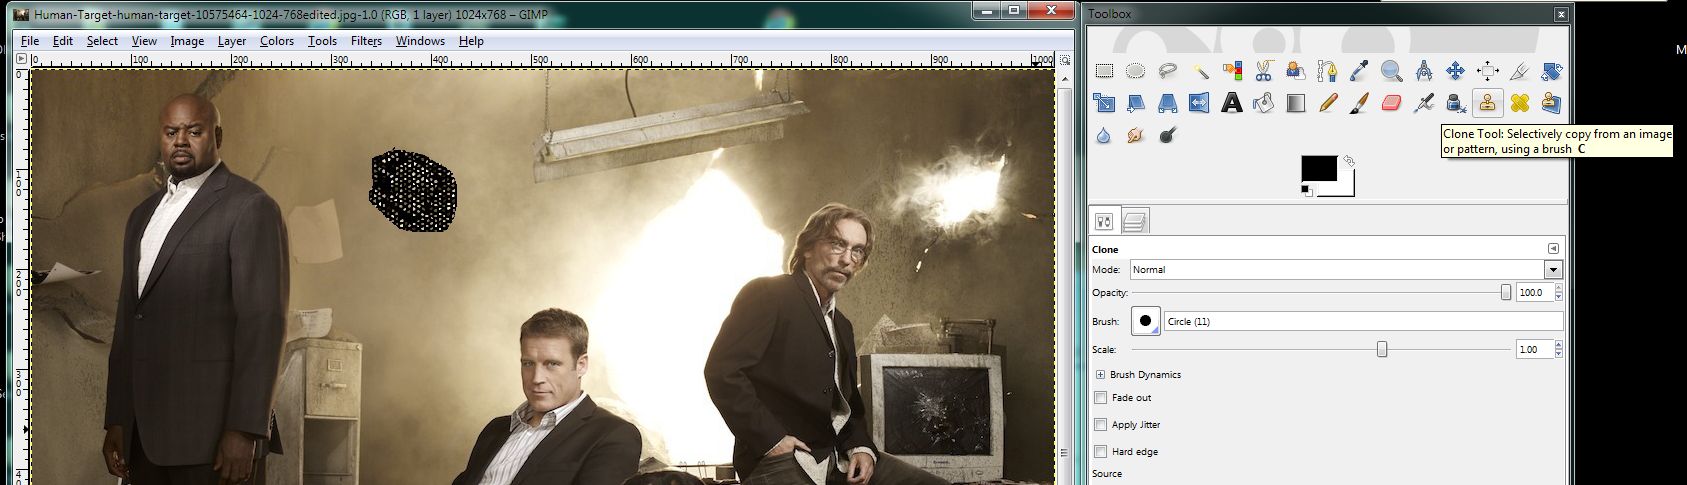
2. We’re using the same image as last time, an advertising photo from our favorite (but cancelled) TV show, “Human Target”. In our last post, we put that black spot on the wall using the mosaic filter. Today, we will have some fun replacing Christopher Chance’s (Mark Valley) face with that of Carmine (Simba), the friendly Rottweiler.
Cloning involves careful mouse work so be ready with a steady hand and slow, careful movements. First, we want to place the cursor right where we want to start cloning. In this case, we clicked on the top left of the dog’s face while holding down the CTRL key. In other words, move the cursor to where you want, then press the CTRL key and click the left mouse button once. You know when you’ve done this correctly because GIMP shows a kind of star icon where you clicked.
Next, move the cursor, without clicking any button, to the place where you want to start copying the dog’s face. Again, we moved the cursor up to the top left of Chance’s face. In order to clone a complete face, click the left mouse button and HOLD IT. Don’t let it go. Move the cursor to the right and left over the image that you want to copy to and GIMP will place pixels from the part of the photo that you selected there. Here’s the result of our efforts:
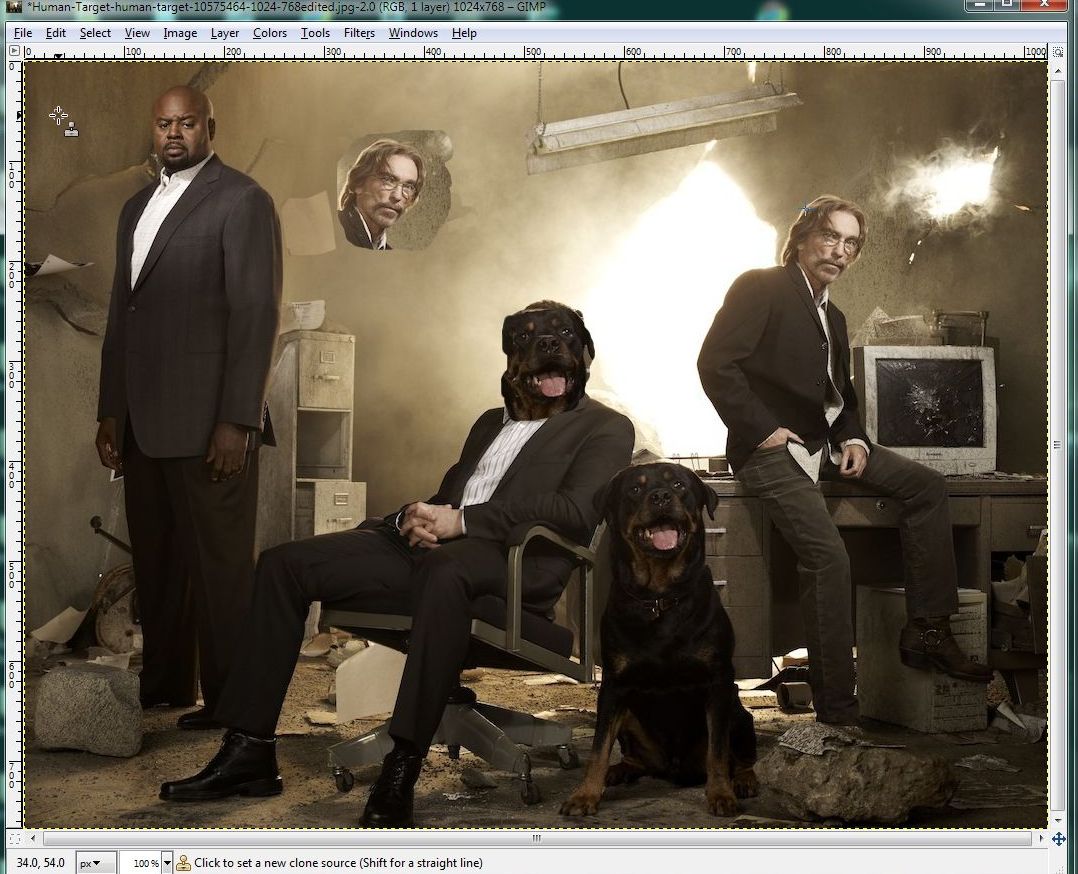
There are a few things to remember. One, never let go of the mouse button when you are cloning a complete face or something that can be identified as an object. If you’re cloning over a cloud, for example, you can choose different parts of the sky separately, then smudge the area to make it look more real. If you cloning a cloud from one area to another, however, don’t lift the mouse button.
Two, the size of the area cloned by the cursor is controlled by the size of the brush you are using. Look down under the tool menu and find the icon of the brush you are using. Click on the icon and you can vary the size and shape of the brush.
As long as you haven’t lifted the mouse button, you can go over the same area again, just in case your hand wasn’t steady. If you happen to make a mistake, remember that you can hit CTRL and z to ‘undo’ what you’ve just done. You can actually hit CTRL/z as many times as you want, going back to the start of the whole process again, if necessary.
The clone tool takes some getting used to but we’ve had a lot of fun with it over the years. We hope you find it useful and fun, too.
Thanks for reading!
One thought on “Using GIMP – How to clone part of a digital image.”